CollegeSportsUnfiltered.com
College sports... without the power-hungry mods!
You are not logged in.
- Topics: Active | Unanswered
Pages: 1
#1 2017-12-03 22:00:03 - Posting images and video on the site
- admin (289)
- Administrator

- Registered: 2017-08-24
- Posts: 2,244
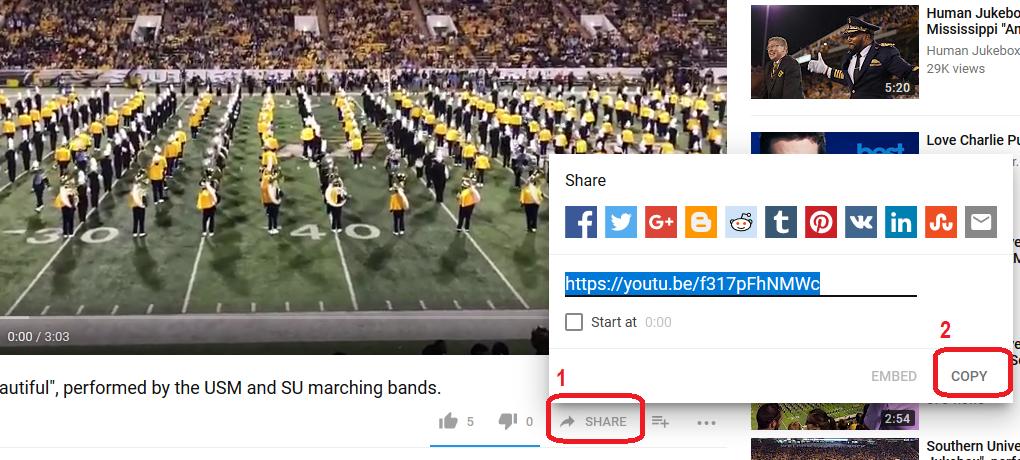
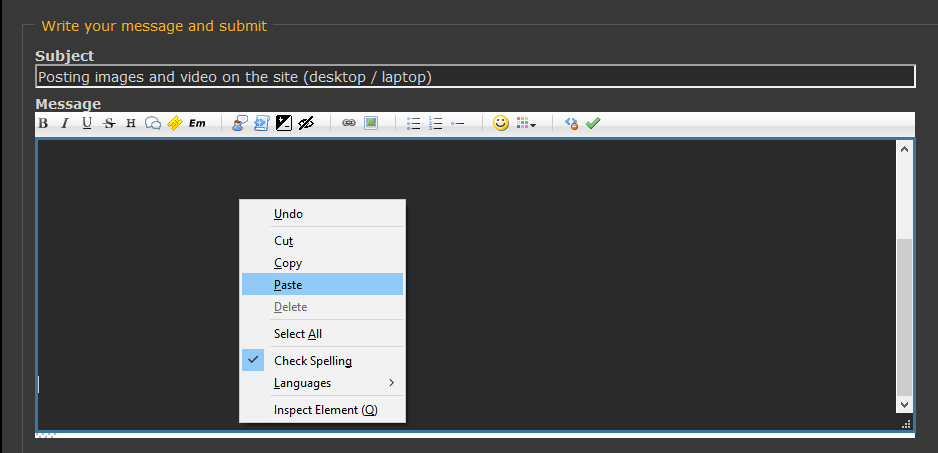
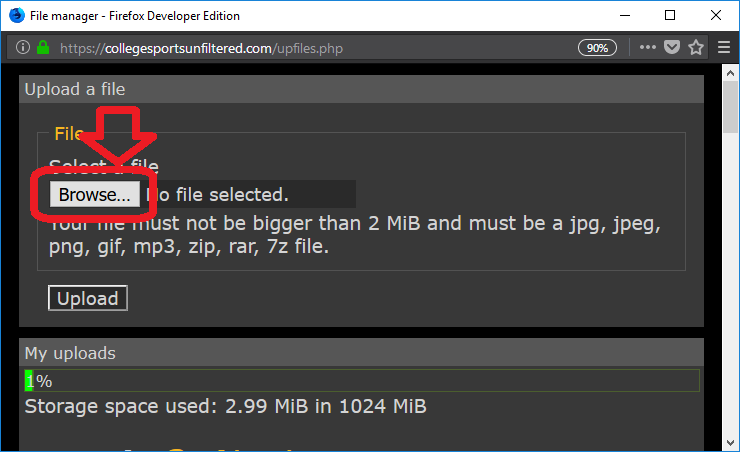
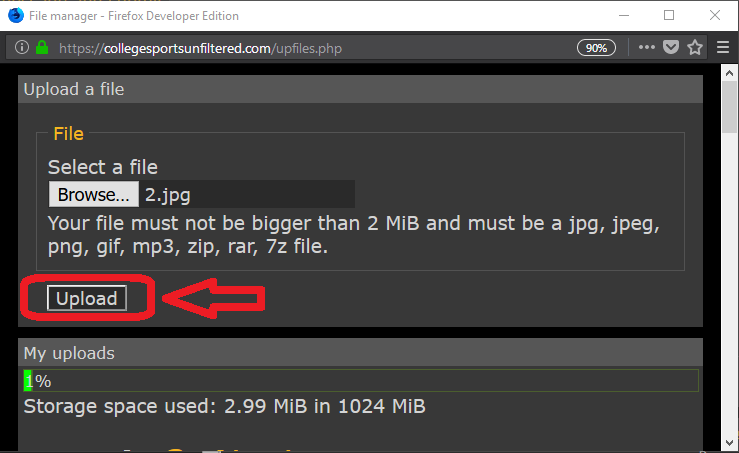
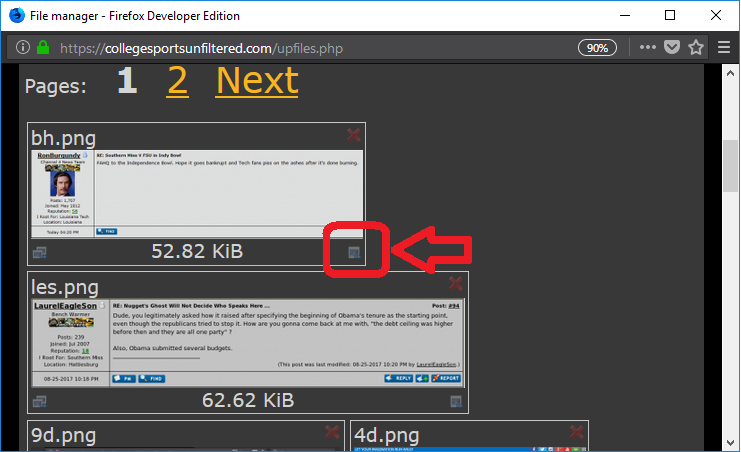
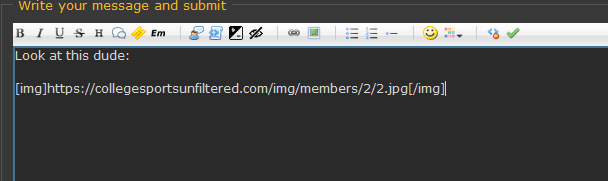
Posting images and video on the site
Offline


#2 2017-12-03 22:35:43 - Posting images and video on the site
- admin (289)
- Administrator
- Registered: 2017-08-24
- Posts: 2,244
Re: Posting images and video on the site


Offline
#3 2017-12-04 07:26:08 - Posting images and video on the site
- Eaglebird Humperdink (142)
- Member
- Registered: 2017-09-11
- Posts: 525
Re: Posting images and video on the site
Offline
#4 2017-12-04 08:01:50 - Posting images and video on the site
- USMstang (303)
- Member
- From: 7 miles North of Cat Island
- Registered: 2017-08-25
- Posts: 1,048
Re: Posting images and video on the site
Still sleeping with a Dixie Darling!
Offline
#5 2017-12-04 08:02:04 - Posting images and video on the site

#6 2017-12-04 18:50:46 - Posting images and video on the site
- admin (289)
- Administrator
- Registered: 2017-08-24
- Posts: 2,244
Re: Posting images and video on the site

Offline
Pages: 1